CREATING AN IMPELLER WITH CATIA V5

Before you start, make sure your
units are set to English.
Go to the Generati 16116l1115q ve Shape Design module,
under Shape in the Start menu.
Create an Axis system by clicking the
Axis icon and hit OK,
this will default to 0,0,0 for Axis System.1
![]()
You will create 3 sets of points using the following process:
Double click the Point icon, this will stay on until you click
it again, or select another command. Select the Point on Plane option.
Key in your H and V values, then select the plane, then hit OK, then
key in your next V and H, plane and enter until done. You can find
the commands in the "Insert" drop down menu if you cannot find the icons.
The first 5 points are on the YZ plane,
(By selecting the ^ on that plane):
H:0 V H:0.1 V:1.98 H:0.7 V:1.2 H:1.5 V:0.2 H:2.6 V:0
![]() =PTS.1-5
=PTS.1-5
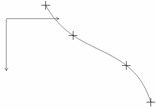
Use the spline command to create Spline.1,
pick the points in line, top to bottom or bottom to top.
![]() =Spline.1
=Spline.1
Create Revolute.1 with the appropriate command
(Surface Revolution), in the command box:
Profile: Spline.1
Axis: Z (It will say Axis system.1\Edge.4)
Angle 1: 360 (leave Angle 2 at 0)
![]() =Revolute.1
=Revolute.1
(You must hit OK after inputting all the values for each dialog box)
No-Show
all but the Axis. 
Put a plane at Z=1.5 by selecting the plane command with the dialog box values:
Plane type: Offset plane
Reference: XY Plane
Offset: 1.5
![]() =Plane.1
=Plane.1
Create a Spline on Plane.1 from the points:
H:-0.2 V:0.59 H:0.25 V:1.0 H:0.7 V:1.8 H:1.25 V:2.165 =PTS.6-9
=Spline.2

Retrieve Revolute.1 from No-Show and project Spline.2 onto it,
in the Projection dialog box:
Projection Type: Along a direction
Projected: Spline.2
Support: Revolute.1
Direction: Z axis (Nearest Solution on)
![]() =Project.1
=Project.1
No-Show all but the axis.
Create another Spline on the YZ plane with the point values: =PTS.10-12
H:1.3 V:2.0 H1.8 V:0.5 H:2.5 V0.2 =Spline.3
Revolve Spline.3 around the Z axis =Revolute.2
No-Show the points and the Spline and retrieve Project.1.

Project Project.1 onto Revolute.2 with the dialog box values:
Projection Type: NORMAL (it will project out to the surface)
Projected: Project.1
Support: Revolute.2 (Nearest Solution on) =Project.2
No-Show Revolute.2, leaving Project.1, Project.2 and the axis.
Connnect the tops of the 2 curves with a line, the dialog box will show:
Type: Point To Point
Point 1: Project.1\Vertex
Point 2: Project.2\Vertex (I doubt the order is important)
Support: None ![]() =Line.1
=Line.1
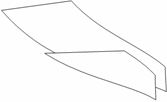
Using the Loft function, select Project.1and Project.2
(These are Sections, and will appear in the top box)
Then change to the SPINE tab(in the dialog box) and select Line.1
(This will blend a surface between the curves along the spine)

![]() =Loft.1
=Loft.1
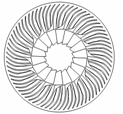
Now duplicate Loft.1 with the Circular Pattern function,
Select the loft after clicking the icon, then the dialog box will appear:
Parameters: Instance(s) and Angular Spacing
Instances: 18
Angular Spacing: 20
Reference Element: Z axis
(select
the box, pick the axis after it turns blue) ![]() =CircPattern.1
=CircPattern.1
No-Show all but Project.1 and Project.2
Rotate the Projects with the values:
Element: Project.1(2) (they must be done 1 at a time, do Project.1 first)
Axis: Axis System.1\Edge.2 (select the Z leg of Axis System.1)
![]() =Rotate.1
=Rotate.1
Angle: 10 (select the Hide Initial Element option, then OK) =Rotate.2
Now split the curves called Rotate.1 & 2 with a point, select
the point icon and select Rotate.1, the point dialog box will show:
Point type: On curve
Curve: Rotate.1
Distance On Curve (on)
Geodesic (on)
Point: Default
Length: 1.0 (this is the only value you have to put in) =Point.13
Use a length of 1.3 for Rotate.2 =Point.14
After selecting the icon, select the lower end
(the side to keep) then the point, dialog box shows:
![]() =Split.1
=Split.1
Point type: On Curve =Split.2
Element to cut: Rotate.1
Cutting elements: Point.13
Support: None
Create a line between the vertices of Split.1 and 2. =Line.2
Create a loft from Split.1 and 2 along Line.2 =Loft.2


Create a Circular Pattern of Loft.2 with the same values used on Loft.1.
=CircPattern.2
No-Show all but Project.1 and Project.2
Rotate Project.1 and 2 again about Z, this time only 5 degrees. =Rotate.3
=Rotate.4
Split with the point at 1.5 for Rotate.3
=Point.15
Split with the point at 1.93 for Rotate.4
=Split.3
Connect the curves with a line.
=Point.16
Loft (same as before) =Split.4 Circular Pattern, this time 36 instances, at 10 degrees =Line.3
=Loft.3
The surfaces are made from curves (splines), the
curves are made from points, they are associative. =CircPattern.3
Now double click on any point (PT.6 is the best)
and put in some new values, it updates quickly.
|