HOW TO USE MagicISO
1. Click ![]() to
create new image file.
to
create new image file.
2. Drag your files or directories from "File Folders"/ "File
List"/Windows Explorer into MagicISO. or click "![]() Add
Files"/"
Add
Files"/"![]() Add
directory" to a 858s1823i dd.
Add
directory" to a 858s1823i dd.
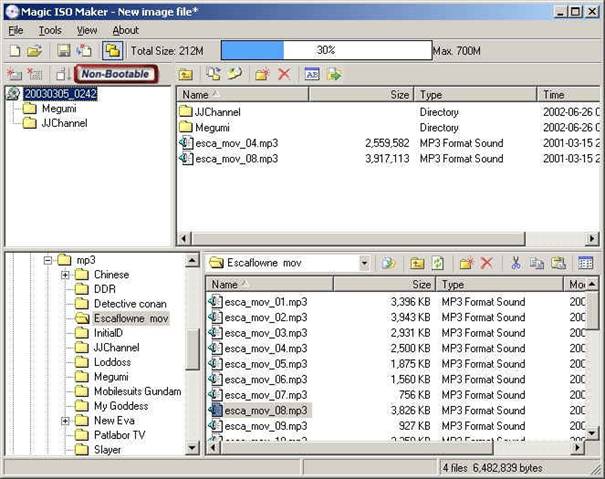
3. Edit ISO Image. User can click ![]() to
create new folder, click
to
create new folder, click ![]() to
delete files or folders, Press F2 or click
to
delete files or folders, Press F2 or click ![]() to
rename files, folders and volume. Select files, Drag to destination folder then
drop, you can move file position and copy file to new position with pressing
CTRL.
to
rename files, folders and volume. Select files, Drag to destination folder then
drop, you can move file position and copy file to new position with pressing
CTRL.
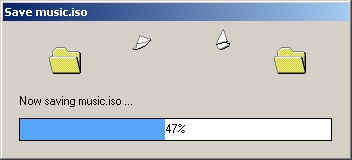
4. Click ![]() to
save current ISO file. If it's newly created one, you need to enter the ISO
file name. Click
to
save current ISO file. If it's newly created one, you need to enter the ISO
file name. Click ![]() to
save as a new ISO file.
to
save as a new ISO file.
5. Saving files.
Open ISO File
Click ![]() ,
the "Open ISO File" dialog will pop-up, select file and click
"Open" button
,
the "Open ISO File" dialog will pop-up, select file and click
"Open" button
Or set disk path in "File Folders", then double click on filename in "Files List".
After open ISO file, It's ready to edit current ISO file.
Extract files and folders from ISO image
First. Select files and folders in "ISO
Files", and Click ![]() to extract.
to extract.
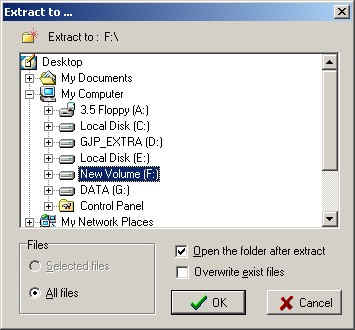
Or select files and folders in "ISO File" list and drag them to "File Folder" or "Files List" or Windows Explorer and other application then drop.
Add File and folder
click "![]() Add
Files"/"
Add
Files"/"![]() Add
directory" to a 858s1823i dd.
Add
directory" to a 858s1823i dd.
Or select files and folder in "File
List", and click ![]() to
add.
to
add.
Or drag files and folders from "File Folder" or "File List" or Windows Explorer and other application.
Edit ISO Image file
Click ![]() to
create new folder in the ISO image.
to
create new folder in the ISO image.
click ![]() to
delete files or folders.
to
delete files or folders.
Press F2 or click ![]() to
rename files,folders and voume.
to
rename files,folders and voume.
Select files, Drag to destination folder then drop, you can move file position and copy file to new position with pressing CTRL.
Save ISO File
After you complete to edit ISO, Click ![]() to
save current ISO file. If it's newly created one, you need to enter the ISO
file name.
to
save current ISO file. If it's newly created one, you need to enter the ISO
file name.
Or Click ![]() to
save as an new ISO file.
to
save as an new ISO file.
Make ISO from CD-ROM
Click ![]() ,
The "Make ISO From CD-Rom" dialog will pop-up.
,
The "Make ISO From CD-Rom" dialog will pop-up.
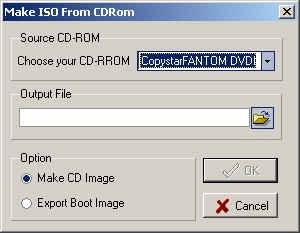
Select your CD-ROM drive which holds disc that you want to copy.and enter the name of ISO File. Click Ok to start.
Click "![]() Make ISO from CD-Rom" in "Tools" Menu, The "Make ISO From
CD-Rom" dialog will pop-up.
Make ISO from CD-Rom" in "Tools" Menu, The "Make ISO From
CD-Rom" dialog will pop-up.
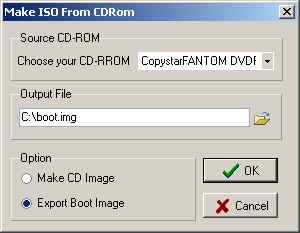
Select your CD-ROM drive which holds disc that you want to export boot image. choose "Export Boot Image" and enter the name of IMAGE File. Click Ok to start.
Click "![]() Make boot image from floppy disk" in "Tools" Menu,
and enter the name of boot image to save.
Make boot image from floppy disk" in "Tools" Menu,
and enter the name of boot image to save.
Set boot image
Click ![]() to
set boot image file.
to
set boot image file.
Extract boot
image from ISO
Click ![]() to
save boot image from ISO.
to
save boot image from ISO.
Clear boot
imformation
Click ![]() to
clear boot information in the current ISO File.
to
clear boot information in the current ISO File.
Click the 'Tools' menu and then select the 'ISO to BIN' option. The 'ISO to BIN converter' window will pop-up.
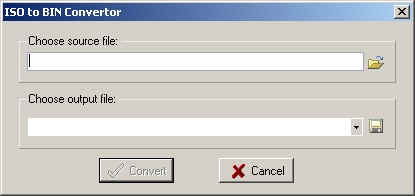
Input or select the name of ISO file which you want to convert.
Input or select the name of BIN file to save .
Input or select the name of BIN file which you want to convert.
Input or select the name of ISO file to save .
Click the 'Tools' menu and then select the 'Any format convert ...' option. The 'Any format to ISO Convertor' window will pop-up.
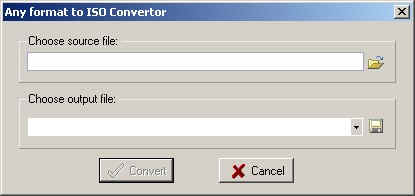
Input or select the name of any cd image file(*.bin;*.nrg;*.cif;*.vcd,*.fcd;*.mdf) which you want to convert.
Input or select the name of ISO file to save .
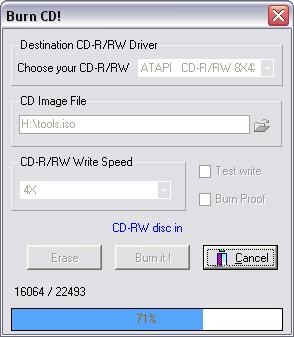
Click ![]() to
open "Burn CD!" Dialog
to
open "Burn CD!" Dialog
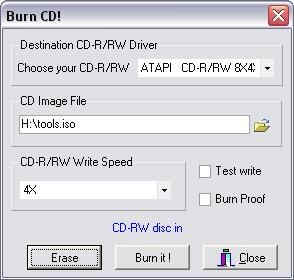
"Choose your CD-R/W": lists all of available CD-R/RW recorder in your system.
"CD Image File": User selects CD image file(include ISO,BIN,NRG,CIF ...etc) that user want to write it to CD.
"CD-R/RW Write Speed": list all of available CD-R/RW write speed. choose it to control speed of burning CD.
"Test Write": If the user checks this option, MagicISO will simulate writing CD image file to CD for detecting error.
"Burn Proof": Verify data after writing.(Must be supported by your CD-R/RW recorder .
Status Text: Shows status of current CD-R/RW recorder, If status text is in blue color,the CD-R/RW is ready for burning.
"Erase": Click "Erase" button to bland CD-RW disc.Notes.
"Burn It!": Click "Burn it!" button to start "burning CD" progress.
|
