ALTE DOCUMENTE |
Module 5 - Slices
Table of Contents
Differences between Dynamic and Classic Slices
Setting Row or Column Axis Precedence
Inserting multiple slices in an Excel Sheet
![]()
Dynamic slices provide most of the view configuration options of the Cube Viewer directly in the Excel environment. In a dynamic slice, you can:
Drill down on the consolidations
Roll up the consolidations
Edit the row, column, and title subsets
Change the title elements
Suppress zeros
View the elements by aliases
Apply data spreading
Apply holds
Chart against slice values
Drill through to related data
A dynamic slice maintains a two-way connection, through DBRW worksheet functions, to the TM1 cube from which it originates. When the values in the cube change, the corresponding values display when you update the dynamic slice worksheet. Similarly, changes in dynamic slice values are written to the cube by way of the DBRW formulas.
TM1 has provided the capability to slice cube data into Excel for a long time. However, the slices in previous versions of TM1 presented a static view of the cube data. These slices are now referred to as "classic slices." You can update the data values in a classic slice. However, you cannot edit subsets, nor can you drill down or roll up consolidations in a classic slice.
While the dynamic slices provide significant advantages over the classic slices, TM1 allows you to choose between the two of them.
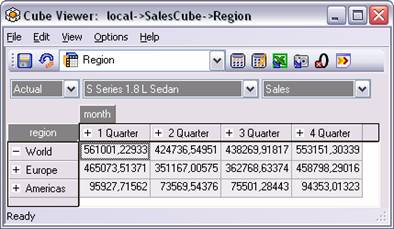
By default, TM1creates a dynamic slice when you click File → Slice or click the following icon in the Cube Viewer.
![]()
If you prefer to create classic slices, click Options → Classic Slice Mode from the Cube Viewer. When you select the Classic Slice Mode command, a check mark appears next to the command and all slices you create from this client are classic slices.
Another menu point that should be explained in this context is Slice to New Workbook. When setting a check mark here, TM1 opens a new workbook for each slice in Excel. If the check mark is not set, all slices are inserted into the same workbook but into different sheets.
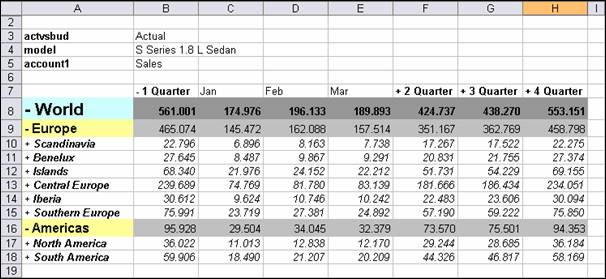
Open the View Region in the SalesCube.
Before you create the slice make sure that the dynamic slice mode is activated. (See 1.2. Menu Options)
Now click on the following Icon or in the menu File Options.
![]() Slice
Slice
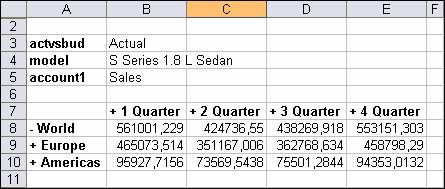
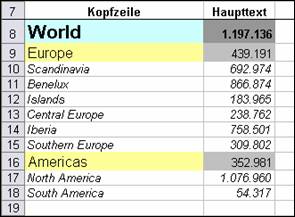
The following slice will appear:
Note:
Save the slice as: SalesCube_dynamic_slice
You can double-click any consolidated row or column element in a dynamic slice to drill down or roll up the consolidations.
If you double-click a consolidated element that is displayed with a (+), the element collapses its children.
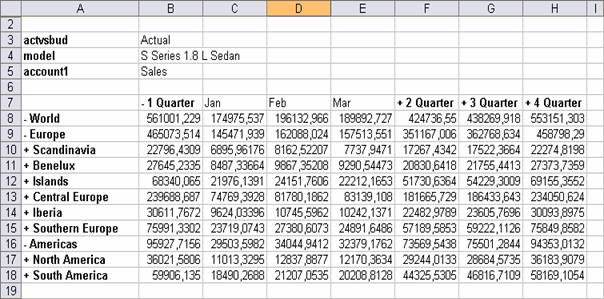
In our case click on Europe,
Then you should have the following view in Excel:
The slice SalesCube_dynamic_slice should be formatted like this:
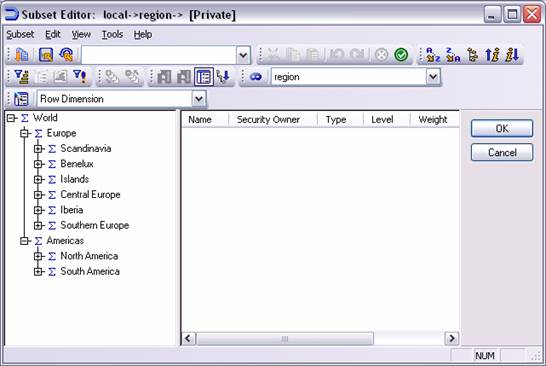
Select a row element from the slice, for
example
Then TM1 opens the Subset Editor.
![]()
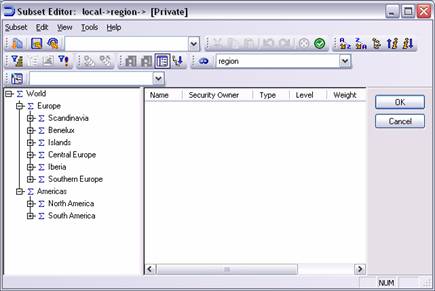
Click on the icon indicated by the red arrow. Then the Excel Sheet named Edit Element Formats is opened.
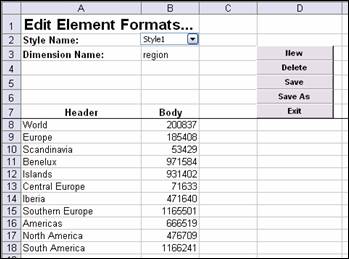
Format the rows in this Excel Table as follows:
In this sheet you have all Excel format possibilities available.
Now click on the icon Save As and save the formatting as Row dimension.
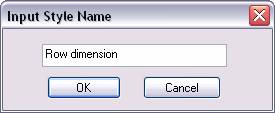
The format style, that was just created, can be selected in a drop-down menu in the Subset-Editor.

Click on OK. Back in Excel you should see the formatted slice:
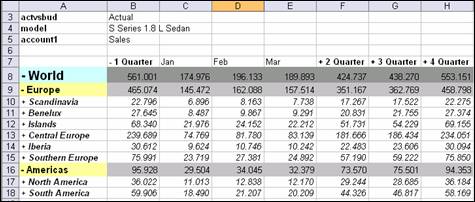
Save this slice as SalesCube_dynamic_slice_formatted.
A slice can contain row and column formats at the same time; but then you have to decide, which formatting has priority.
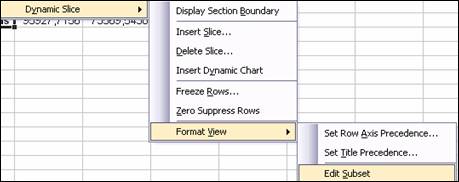
Click with the right mouse key on a data cell and select Dynamic Slice Format View
Rows override Columns.
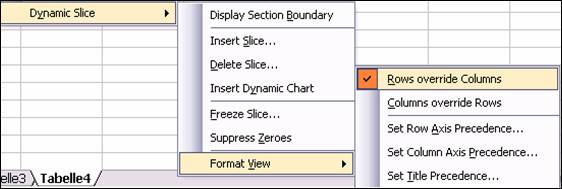
In this case the formatting of the Row Axis has precedence to the formatting of the columns. If more than one dimension is set on one axis the precedence order between these dimensions has to be defined as well.
Open the view sales1qtr in the SalesCube.
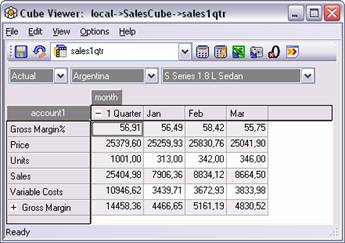
Create a dynamic slice.
To display section boundary make a right mouse click on a data cell and select Dynamic Slice→Display Section Boundary.
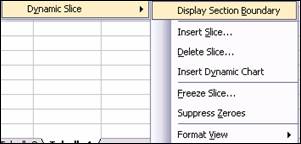
The section boundary is shown with a double border. The border contains cells from the slice; these cells contain row-titles, column-titles and data cells, as well as blank rows and columns around the cells. These blank rows and columns can be filled with user defined formulas.
You can insert more than one dynamic slice into an Excel Sheet. Normally you use them to compare related data in one sheet.
After displaying section boundary, click with the right mouse key in a data cell in the slice and select Dynamic Slice→Insert Slice.
The dialogue box Insert a Dependent Slice is opened.
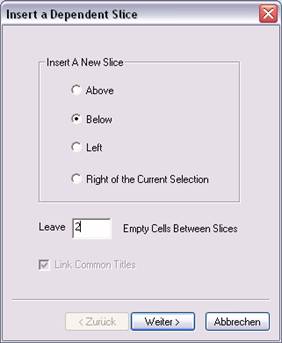
If you select Above or Below, the new slice will be related to the columns of the actual slice.
If you select Left or Right of the current Selection, the new slice will be related to the rows of the actual slice.
Furthermore, you have to define the number of empty cells between the new and the actual slice.
Select Below and enter in the array that defines the number of empty cells . Afterwards click on Next.
The dialogue box Select a cube is displayed.
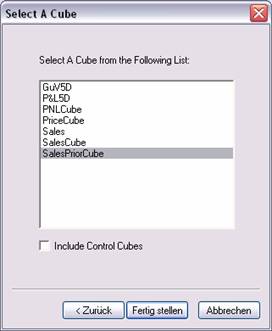
The box shows all the cubes that are sharing the dimensions, which are used on the related axis on the actual slice.
Select the SalesPriorCube.

If the actual slice uses stacked dimensions, the dialogue box Select a Cube shows only the cubes that contain all the stacked dimensions along the related axis.
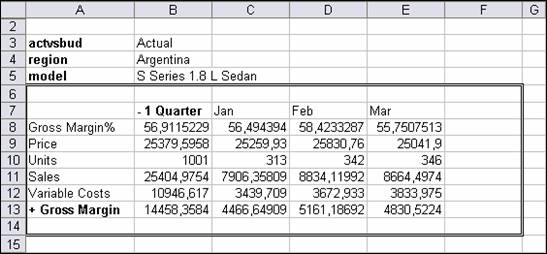
Create the following view
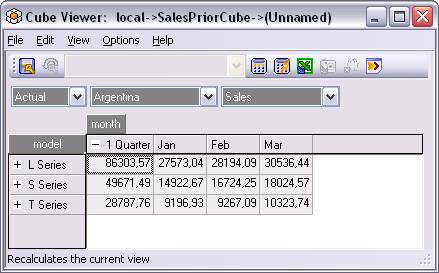
Afterwards click on the icon Slice and the slice will be inserted into the Excel sheet.
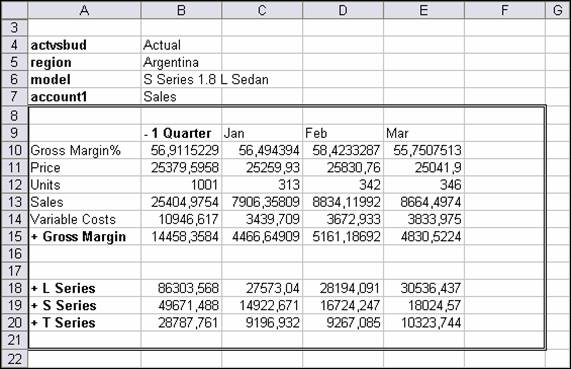
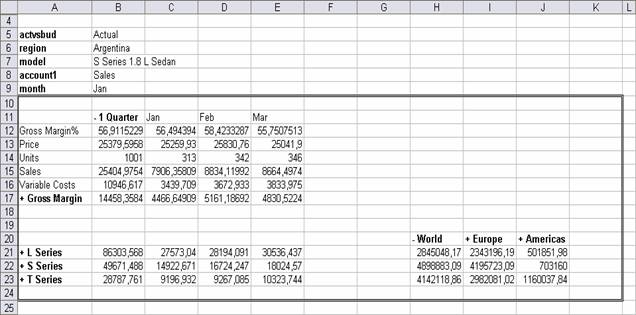
Now we will repeat this procedure and create a new slice next to the slice at the bottom. You have to click on insert a new slice Right of the current section. Select the PriceCube and create the following view:
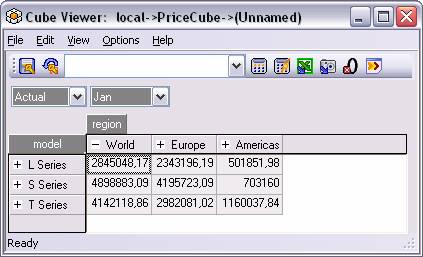
If you have inserted this slice you should have the following view:
![]()
![]()
Now we want to insert a forth slice - now from the cube SalesCube - on the top right.
TM1 constrains the view along both the row and column axes, which means you cannot edit the row or column subsets, nor drag additional dimensions to either axis. The only way you can change the view configuration is to select new title dimension elements.
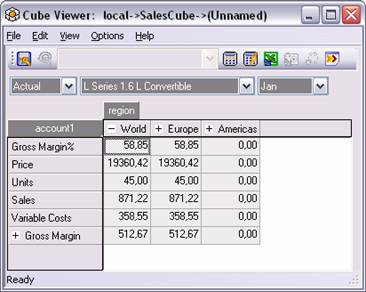
You should get the following result in your Excel Sheet:
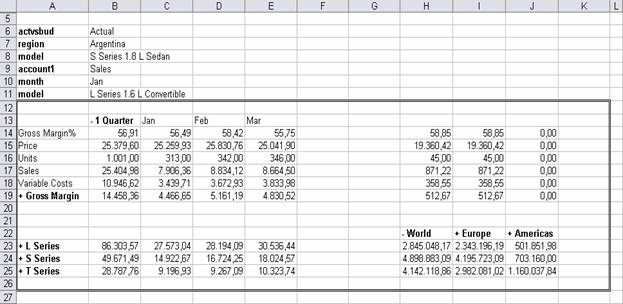
Save the Excel Sheet as Dynamic_slices_2.
|
