TIP
If you do not see the fills for open paths, check the object preferences. (See Appendix C
The most common fill is the Basic fill. This is the equivalent of filling the object with a solid color. FreeHand provides you with many different ways to apply Basic fill.
To apply a Basic fill using the Fill inspector:
Select the object.
With the Fill inspector displayed, choose Basic from the Fill pop-up menu. This displays the Basic fill settings
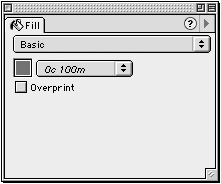
Choose a color for the fill from the color list.
To apply a Basic fill using the Tools panel:
Select the object.
Click the triangle in the Fill color box at the bottom of the Tools panel . This opens the pop-up color palette

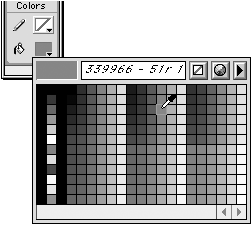
Choose a color from the color palette.
The pop-up color palette is set by default to show the 216 Web-safe colors. You can change that setting to display the colors in the Swatches panel.
To change the display of the pop-up color palette:
Click the color box to open the pop-up color palette.
Click the palette triangle to open the options menu
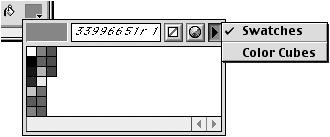
Choose Swatches to display the colors from the Swatches panel.
Setting OverprintingYou may notice the Overprint settings for many of the fills. If you set an object to Overprint, that object will not knock out any colors below. Instead it will mix the colors in that object with the ones below. You cannot see overprinting on your screen. Depending on the preference setting, objects that have an overprint applied will be displayed with a pattern of white Os on top. You do not see overprinting in the output of most color printers. You need to make separations of your colors to see where the colors will overprint. |
To apply a fill color using the Swatches panel:
Select the object.
TIP
Make sure that Basic or None is chosen in the Fill inspector. If another type of fill is listed, you may not see the color you choose.
Click the Fill drop box in the Swatches panel. A black line appears around the box that indicates that the fill is chosen in the Swatches panel
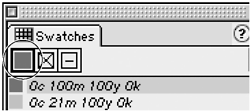
Click the name of the color you want as the fill in the Swatches panel.
or
Drag a color swatch from the Color Mixer onto the Fill drop box in the Swatches panel.
TIP
The box next to the Fill drop box controls the stroke color. (See Chapter 15 Strokes
TIP
If no object is selected, any changes you make to the fill color are applied to the next object you create.
To change a fill color by dragging:
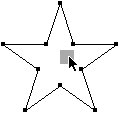
Drag a color swatch from the Color Mixer or the Swatches panel directly onto the object
TIP
You do not have to select an object to drag a color swatch onto it.
TIP
Hold the Shift key as you drag the color swatch onto the object to make sure that only the fill color changes.
In addition to the colors, there is another item in the Swatches panel called None. While not a color per se, the None fill is very important. When you apply the None fill to an object, the fill of the object becomes transparent . Fortunately you have three different ways to apply the None fill.

To change a fill to None:
Choose the object you want to become transparent.
Make sure the Fill drop box is selected in the Colors panel.
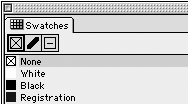
Click None in the Swatches panel. An X appears in the Fill drop box, indicating that there is no fill
or
Click the None icon in the Fill color box pop-up palette

or
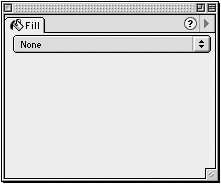
Choose None from the Fill inspector list
TIP
Objects with no fill color are invisible unless they have a stroke applied. (See Chapter 15 Strokes
|