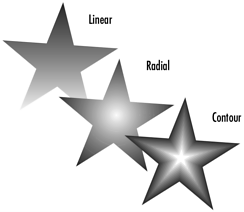
Gradient fills start with one color and then change into others. There are three types of gradients: linear, radial, and contour . In a linear gradient, the colors change along a line that can be angled in any direction. A radial gradient is circular. In a contour gradient, the color change is based on the shape of the object.
To choose the type of gradient fill:
Choose Gradient from the pop-up menu in the Fill inspector.
Click the Linear icon to see the settings for a linear gradient
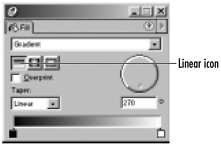
or
Click the Radial icon to see the settings for a radial gradient
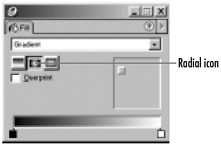
or
Click the Contour icon to see the settings for the contour gradient
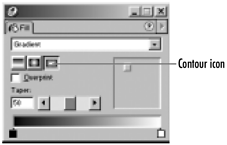
Use the other Color pop-up menu to choose the color for the other end of the gradient.
To create a linear gradient fill:
With the object selected, click the Linear gradient icon in the Fill inspector
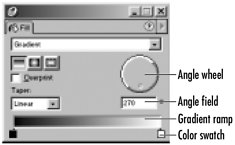
Click either of the color swatches to choose the colors for each end of the gradient. The pop-up color palette lets you choose a color
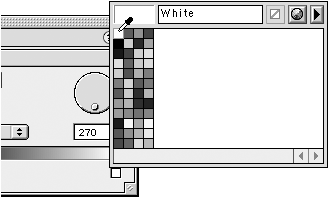
or
Drag a color from the Swatches panel or Color Mixer. The change between the colors is displayed in the Gradient ramp.
To add colors in between the end colors, see the exercise on page183.
Use the Angle field or rotate the wheel to set the angle for the fill.
TIP
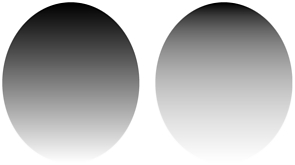
Changing the direction of the gradient fills creates the illusion of light reflecting off different surfaces. This creates a 3D effect
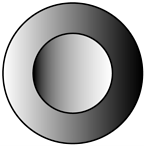
Use the Taper list to choose how fast the gradient changes.
o Linear changes in uniform increments from one color to another.
o Logarithmic changes more drastically from one color to another
FreeHand also lets you apply a linear gradient by dragging a color without using the Fill inspector and without selecting the object.
To apply a linear gradient by dragging a color:
Press the Control/Ctrl key as you drag a color swatch onto an object that has one color already applied as a Basic fill. A diamond color swatch indicates you are dragging a linear gradient onto the object

Release the mouse button on the object. A linear gradient fills the object with the color of the swatch applied as the second color.
TIP
Where you drop the swatch determines the angle of the fill.
In a radial gradient, the color starts at a center point and moves outward in a circle. A Radial gradient is like a sun radiating colors outward.
To create a radial gradient:
With the object selected, click the Radial gradient icon in the Fill inspector
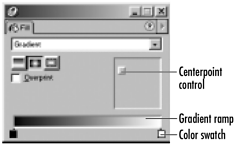
Choose the color for the outside of the radial fill by changing the color swatch on the left side of the ramp.
or
Drag a color from the Swatches panel or Color Mixer. The change between the colors is displayed in the Gradient ramp.
Choose the color for the inside of the radial fill by changing the color swatch on the right side of the ramp.
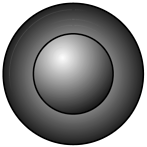
Drag the centerpoint control to change the position of the inside color.
TIP
Position the centerpoint of a radial gradient off-center to create the effect of a 3D sphere
To apply a radial gradient by dragging a color:
Press the Opt/Alt key as you drag a color swatch onto an object that already has one color applied as a Basic fill. A circle color swatch indicates you are dragging a radial gradient onto the object.
Release the mouse button on the object. A radial gradient fills the object with the color of the swatch applied as the second color

TIP
The color of the swatch is applied as the inside color of the radial gradient.
TIP
Where you drop the swatch determines the center of the radial gradient.
To create a contour gradient:
With the object selected, click the Contour gradient icon. The settings for the contour gradient appear
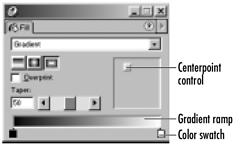
Choose the color for the outside of the contour gradient by changing the color swatch on the left side of the ramp.
or
Drag a color from the Swatches panel or Color Mixer. The change between the colors is displayed in the Gradient ramp.
Choose the color for the inside of the contour gradient by changing the color swatch on the right side of the ramp.
Drag the centerpoint control to change the position of the inside color.
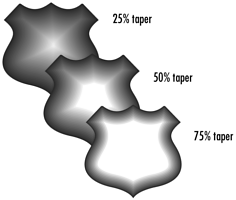
Use the Taper controls to adjust the size of the contour gradient. The higher the number, the more the gradient will fill the object
Avoiding BandingSometimes gradients print with an effect called banding (see page 220). Here are some tips to avoid banding when printing gradients: Print at high resolutions. For most work, this is a minimum of 2400 dpi. Use a lower screen ruling. This is especially helpful when printing to laser printers. Avoid gradients over 7 inches long. This is especially true if you are outputting to a PostScript Level 1 device. If you are outputting to a higher PostScript device, you may not need to limit the length of your blends. Examine the difference between the percentages of each of the CMYK colors. If you are getting banding, try increasing the difference between the percentages. |
To apply a contour gradient by dragging a color:
Press the Cmd-Opt key (Mac) or Control-Alt key (Win) as you drag a color swatch onto an object that has one color already applied as a Basic fill. An irregular-shaped color swatch indicates you are dragging a contour gradient onto the object.
Release the mouse button on the object. A contour gradient fills the object with the color of the swatch applied as the second color

TIP
The color of the swatch is applied as the inside color of the contour gradient.
TIP
Where you drop the swatch determines the center of the contour gradient.
Gradient fills can contain more than one color.
To add colors to gradient fills:
Drag a color swatch onto the gray area between the top and the bottom colors . You can drag swatches from the Swatches panel, the Color Mixer, or the color boxes in the Fill inspector.
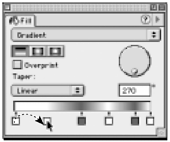
or
Drag a color from either end color swatch.
or
Hold the Control/Alt key as you drag to copy the colors of existing color swatches.
To delete a color, drag the color box off the gray area. (You can not delete the left or right swatches of a gradient fill.)
|