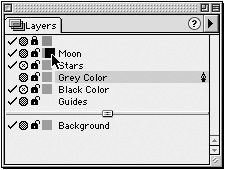
As your artwork becomes more complex, you may find that you need other ways of organizing objects. For instance, you may have many objects that overlap each other and you need to hide some objects while working on others. In that case, you will need to use FreeHand's Layers panel.
To view the Layers panel:
If you do not see the Layers panel on your screen, choose Window > Panels > Layers.
If you have not changed the default layers for your document, you should see three layers: Foreground, Guides, and Background 12312c217m
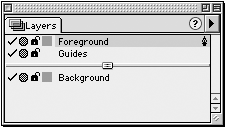
Once you have created a new layer, you may want to rename it so that it reflects the items on that layer.
To rename a layer:
In the Layers panel, double-click the name of the layer you want to rename.
Type the new name of the layer.
Press Return or Enter, or click the Layers panel with the mouse.
To duplicate a layer:
Click the name of the layer you want to duplicate.
Choose Duplicate from the Layers panel menu . The layer and all of the objects on it will be duplicated.

TIP
The Guides layer cannot be renamed or duplicated.
To remove a layer:
Click the name of the layer you want to remove.
Choose Remove from the Layers panel menu. The layer and the objects on it are removed.
TIP
You cannot delete the Guides layer or the very last drawing layer of a document.
TIP
An alert box warns you if you try to remove a layer that has objects on it.
The layer at the top of the Layers panel is in front of the other layers. Layers do not have to remain in the order in which you created them. You use the Layers panel to reorder layers.
To reorder layers:
In the Layers panel, select the name of the layer you want to reorder
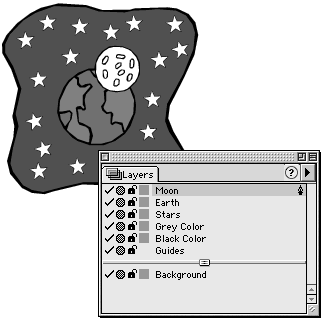
Drag the name of the layer to the spot on the list that represents where you would like the layer to be.
TIP
(Win) A double-headed arrow cursor appears as you drag layers to new positions in the Layers panel.
Release the mouse button. The name of the layer disappears from where it was and reappears in its new position in the Layers panel. All objects on the layer are repositioned in the document

TIP
If you want guides to appear in front of your artwork, drag the Guides layer above the layer that contains the artwork.
When you are working, the objects you create go on the active layer, the one that has the pen icon on the Layers panel. You may want to move artwork from one layer to another.
To manually move objects between layers:
Select the artwork you want to move to a new layer. The layer to which it belongs is highlighted
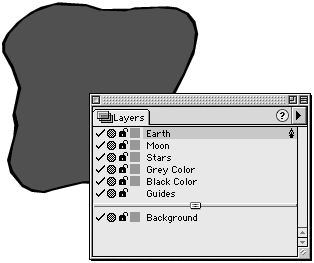
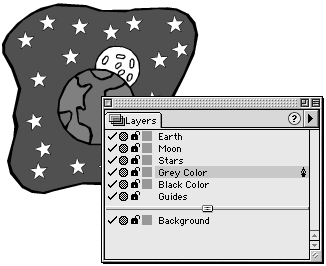
Click the name of the layer that is the destination for the artwork. The artwork moves to that new layer
TIP
To convert a path into a guide, move the guide onto the Guides layer.
TIP
You cannot move artwork onto a locked layer (see page 158).
Some people do not like how easy it is to move objects from one layer to another. FreeHand lets you set a Preference that turns off the ability to move objects by clicking the name of a layer (see Appendix C
If you turn off the default setting, you must use the Layers panel menu to move objects between layers.
To use the menu to move objects between layers:
Select the artwork you want to move to a new layer.
Click the name of the layer that is the destination for the artwork.
Choose Move objects to current layers from the Layers panel menu. The artwork moves to the selected layer.
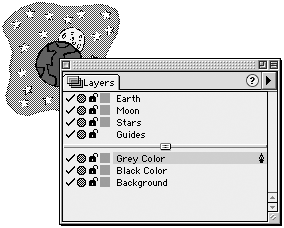
A horizontal line divides the Layers panel. The layers above the line appear normal and print. The layers below the line appear dimmed and do not print. You may find you want to move layers from the printing to nonprinting areas of the list.
To create a nonprinting layer:
Drag the layer below the dividing line in the Layers panel.
Release the mouse button. The layer moves below the line, and any objects on the layer are dimmed and do not print
TIP
Use nonprinting layers to hold images that have been placed for tracing (see pages 74 - 77).
To create a printing layer:
Drag the name of the layer above the dividing line in the Layers panel.
Release the mouse button. The layer moves above the dividing line, and any objects on the layer will print.
TIP
Objects on the Guides layer do not ever print, regardless of where the Guides layer is, either above or below the line.
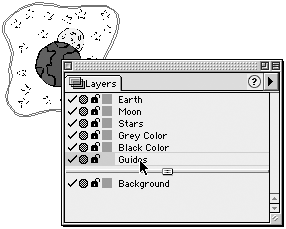
To convert objects to guides:
Select the object you want to convert to a guide.
Click the Guides layer. The artwork is converted to a guide
TIP
You must use the Guides dialog box (see page 36) to convert guides back into artwork.
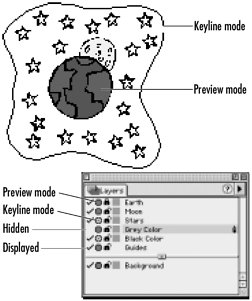
You can also use the Layers panel to change the preview for the objects on each layer. This is especially helpful if you work with very com plicated illustrations and need to select just certain elements.
To hide a layer:
Click the check mark to the left of the layer name . The check mark disappears, making the layer invisible.
To show a layer:
Click the empty space for the check mark to make the layer visible
TIP
Hold the Opt/Ctrl key as you click a check mark to show or hide all the layers.
TIP
Use the All on or All off commands in the Options pop-up menu to quickly show or hide all layers.
To set a layer to the Keyline mode:
Click the gray dot to the left of the layer name . This creates a hollow dot that indicates the layer is in the Keyline mode (see page 31).
To set a layer to the Preview mode:
Click the hollow dot to the left of the layer name . This creates a gray dot that indicates the layer is in the Preview mode (see page 30).
TIP
Hold the Opt/Ctrl key as you click a dot to switch the preview for all the layers.
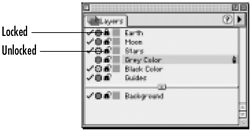
There may be times when you want to see the objects on a layer, but you do not want to be able to select those objects. In this case, you need to lock the layer.
To lock a layer:
Click the open padlock icon. This changes the icon to the closed position and locks all objects on the layer
To unlock a layer:
Click the closed padlock icon. This changes the padlock to the open position and unlocks all objects on the layer
TIP
Objects on locked layers cannot be selected, modified, or moved.
When you select an object, the points and path outlines for that object are displayed in a color (see Chapter 7 Working with Points . You can change that display color by using the Layers panel.
To change the display color of a layer:
Drag a color swatch from the Swatches or Mixer onto the color box for the layer . The color box next to the name changes. All selected objects on that layer have their paths displayed in that color. (For information on working with Swatches or the Mixer, see Chapter 13 Working in Color
|